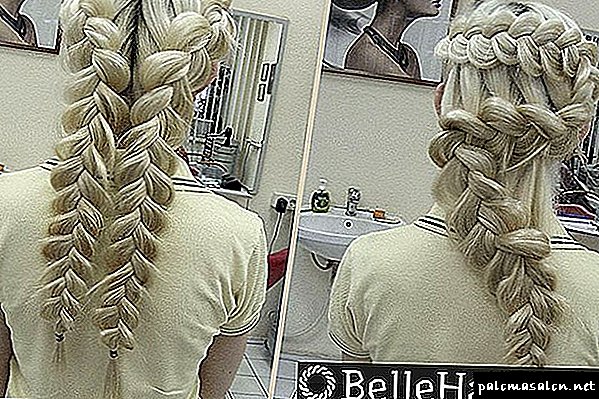
The weaving of the French braid is a delicate matter, but worth it. This hairstyle can be performed in several variations, so it is used absolutely for any image. This hairstyle is the same weaving, but unlike the standard braid, here the form will go out, not inward. Consider a few options, how to braid the French braid with their own hands.
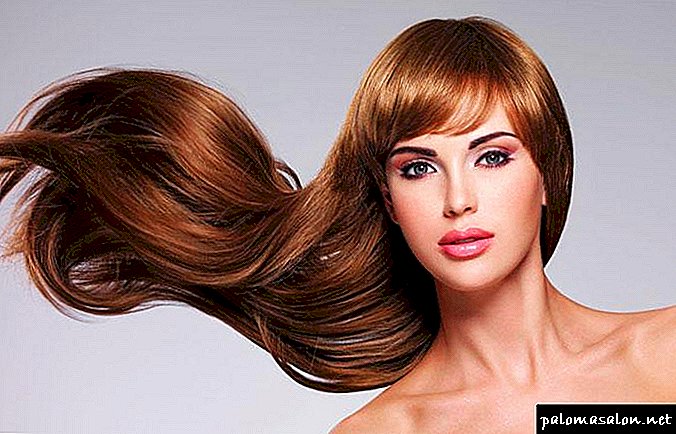
 The French braid is the embodiment of femininity
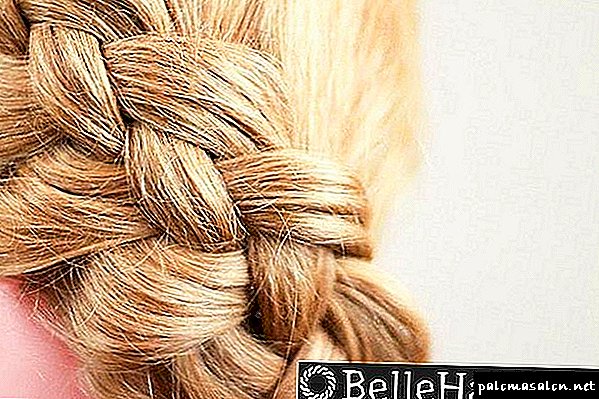
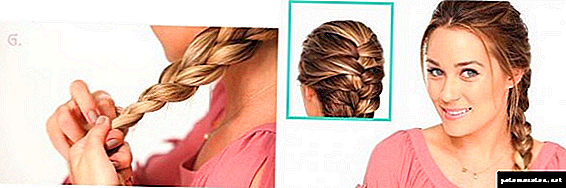
Side braid weave pattern

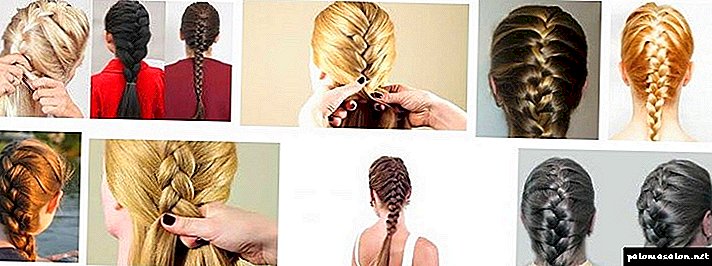
This hairstyle can be created on medium or long curls. To make such beauty, perform the following actions: hair comb well and create parting from the crown to the forehead. On one side of the parting, a strand is taken and divided into 3 equal parts and the braid begins to stumble. The direction is from the bottom up, as this will hide the addition of curls. As soon as one side is braided, strands are added to the braid from the free side, gradually reaching the very tips of the hair. The base can be fixed with a free strand, which will hide the gum.
To make it more spacious, each turn is pulled out of the base. Additionally, you can use studs that will decorate the braid.
It is possible to use only part of the hair in weaving. This will remove excess strands or regrown fringe from the eyes, but the remaining curls will remain in free fall. And the scheme here is this: weaving begins from the side, for which one large strand is taken, with its subsequent division into 3 parts. For each twist of the strand, a little hair is added from the free upper ends, so that the base is gradually thickened. As long as the curls are added, the braid will have a diagonal direction, that is, along the hairline. To give a vertical direction, the braid just start to weave, as usual, where at the end it will be fixed with elastic bands.
This option is perfect hairstyle for those who plan to grow bangs.

The French braid is the opposite: step by step instructions
This hairstyle got its name due to the fact that here each strand does not go up from the bottom, but vice versa. It looks very interesting, and if you show a little imagination, then you can create a masterpiece on your head.

The peculiarity of this option is that at the end it seems that the braid is not braided, but just to be on the head, which is very impressive. And in order to achieve this, the following is to be done: weaving begins in the hair that grows at the forehead line, where again three strands are taken. The left side is thrown from the bottom of the middle and displayed on the top, similar actions are carried out with the right curl. Then, on the left side, a small part is separated and, together with the main left part, the above movements are performed (the separation should be perpendicular to the base). A scythe is created until there is free hair, after which the base can be fixed with a rubber band.

Here, as in the previous version, you can not strongly tighten the strands, then later slightly fluff them. Today there are special pebbles decorations that will look spectacular in your hair, especially in the rays of the sun.
Two French braids - "double effect of beauty"
Many believe that two braids are the prerogative of girls from kindergarten and schoolgirls. And very vain! If you braid the two braids in the above way (the technique is the same, with the only difference that the whole mass of curls should be divided into 2 equal parts and evenly parted) - then the hairstyle will be canceled. With her, you can safely go to work, and on a romantic date, and to a pep party.
Wedding hairstyle
Every bride wants to create a unique image for the wedding. For a romantic and exquisite dress, a French braid is perfect, in which the base can be picked up into a light sloppy bunch. To do this, you will need to do the following: one day before the celebration, your head is well washed with balm-rinse, which makes hair obedient. Since the hairstyle will have to be worn all day, and the bride will have to be active, each stage of weaving will need to be fixed with varnish. Previously, all hair curls in large curls. During weaving, the strands do not tighten tightly, which will leave some curls loose.
The weaving itself looks like this:
- Start working on the left side. Two curls are taken from each side, after which they are crossed, so that they change places. It is recommended to smear the hands with mousse a little to make it easier to control the curls.
- The curls are held with the right hand, and with the left on the same side there is another strand, and they are crossed with the right parts.
- Now the base is held with the left hand, and a new curl is brought out with the right hand and added to the braid, crossing it with the left curls.
- Similar actions, the braid is removed to the neck and fixed with a thin rubber band.
As for the final design, then there is complete freedom of fantasy. You can leave slightly curled locks to fall on the back and shoulders. And you can collect them in a light bundle near the neck with the help of jewelry. And that was not visible fixing gum, one strand of the tail, it is hidden. It is easy to attach a veil to such a hairstyle, and at the top of the head, as well as at the bottom or side.

We add to the hair decor from gum and ribbons
In addition to stones and all sorts of Invisibles, you can use ribbons and elastic bands for braids. If the hair is thick, then a ribbon will look good, and for rarer curls it is better to use thin ribbons. Such an element will betray the brightness and elegance of the image. In order to create such a hairstyle, the following actions are performed: initially, the tape is fixed by means of invisible women, which are fixed under the uppermost locks, that is, under the beginning of weaving. In this case, the division of the strands is carried out in 4 parts.

Weaving begins with the supply of the first curl under the second, while the leftmost strand will always be brought under the adjacent right side. Similar actions are performed alternately, from the right, then from the left side, with a little free hair added to each turn. Depending on the desired pattern, the tape can accompany only one curl or alternate with others.
This hairstyle will be a great addition to the summer look.

Also, you can decorate a pigtail with a decor of rubber bands, which is well suited for children and teenagers. You can take the product as one color or multi-colored. It is necessary to weave rezinochki step by step at regular intervals. This hairstyle will look fun and original!
Weaving strands back to front
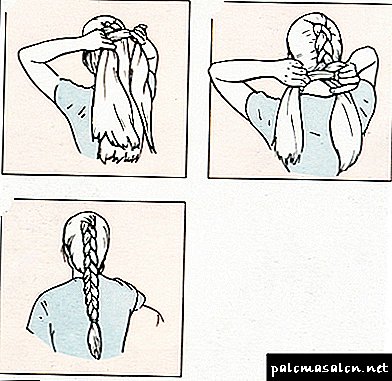
French braids do not necessarily braid from the neck to the neck. You can change the direction. To create such a masterpiece, you need to take a comfortable position so that the head is fully lowered down. 3 strands are selected near the neck and they begin to weave a braid according to the above described example, gradually collecting all the hair.
As soon as the base reaches the top of the head, sufficiently long strands should be collected in the hands. They are fixed with an elastic band, as a result of which the horse's tail should turn out. It can be simply rolled up in the shape of a gulka and fastened with beautiful studs. Or the hair is well combed and wind down around the elastic and only slightly fixed by invisible hair. This hairstyle is great for going to work and to the gym.
Some hairstyle tips
For those girls who take up such weaving for the first time, professional stylists give several recommendations.
- braids are always woven over well-combed hair,
- if such a hairstyle is needed for the main entrance, then it is best to practice with it in advance,
- for hair it is worth using mousse, which will allow the strands to be more obedient and not stick in different directions,
- for the final fixing it is best to use lacquer, as it does not create the effect of gluing hair,
- Do not be afraid of jewelry.

The hairstyle of the French braid - will perfectly help to solve not only the issue of appearance, but also slightly eliminate (if it is necessary urgently) the problem of stale hair. The main plus is the ease of weaving, which does not require much time.
 Weave braids correctly and turn out beautiful
Especially this idea should appeal to moms, who every morning collect babies in kindergarten or school and are looking for ways to remove the hair from the eyes of a child. And yet at the same time, the daughter always remains beautiful and well-groomed. Envy all girlfriends!
What we need to create hairstyles
Before weaving a French braid with your own hands, it is important to know that this hairstyle is suitable for long and medium hair (at least 50 cm), since on a short head of hair it is almost impossible to braid.
So, preparation includes several stages:
- Washing head - a prerequisite for a clean and tidy image, besides curls will be better to give in to stacking, without getting out of the braid.
- Use of styling products allows you to keep weaving in its original form all day, no matter how saturated it is. It is important to follow the rule of their application - retreating from the roots of 10-15 cm, to avoid rapid contamination of the scalp.
- Thermal protection will protect hair from any thermal impact, preventing the appearance of a section of the ends of the hair and dryness along the length. Most effectively used in the form of milk or cream, because they provide protection at the highest possible temperatures.
- Hair drying With the help of the brush-brashig and hair dryer or ironing will greatly simplify the entire process of the formation of hair, because It is much easier to manage straight curls, especially at the beginning of skill development.
- Collect everything you need in one place.: hairpins, hairpins, stealth, hairbrushes, as well as elastic bands, so as not to be distracted by the search for devices in the process of creating hairstyles.

Assemble all hairstyles in one place.
Classic French Style Hairstyle: 1 Image
The classic French hairstyle is addressed most often, and it serves as the basis for more complex versions of styling with it, and the following instruction will help you create it yourself:
Simple hairstyle for every day
- We comb the hair and, having chosen a curl at the top of the head, divide it into 3 strands.
- Alternately extreme strands impose on the center.
- Through one or each weave, we make holders with a small curl into extreme locks until the end of the neck.
- Then we continue weaving to the ends of the hair, but without grabs, and fasten them with an inconspicuous elastic band.
- At the end of the whole process, starting from the tip of the braid, we straighten its sides to make the hairstyle more delicate and voluminous.
Tip! To hide the gum, you can wrap it with a strand from the tail and secure with stealth.

Long braids, tucked into a beam, will make a more collected and comfortable image
If you are interested in how to weave two French braids, then the algorithm of actions described above is preserved, it will only be necessary to divide the hair part by part into equal parts.
If you are tired from the tips of the weaving that you get during the day, or you generally want a more complete styling, you can twist them together in a neat bundle that is sufficient to fix with pins along the edges.
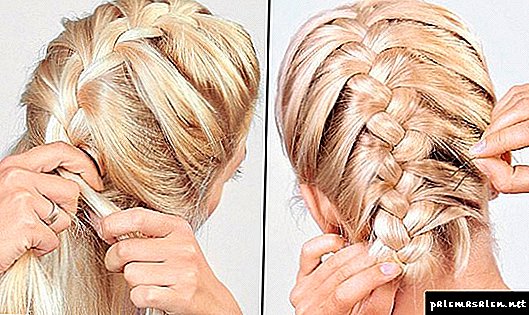
French style reverse braid: 2 image
The high price of styling in the salon will not scare you away, because you can create an elegant hairstyle from French braids with your own hands.
The French styling from the braid on the contrary allows you to visually make the hair more thick, and the hair more voluminous and festive. This time we will consider the refined version of evening styling:
- We divide the combed hair on the side parting.
- From the most part of the hair we begin the reverse weaving: we alternately carry the side strands under the central part and make small hooks.
- Weave itself weaving on the edge of hair growth in the opposite direction.
- From the tip of the braid, we beautifully lay out a rosette, the size of which will depend on the length of the entire head of hair, and fix it with pins.

Spit around - volume and beauty!
Tip! To create a more elegant image, the heart of the resulting “rose” can be decorated with a beautiful hairpin.
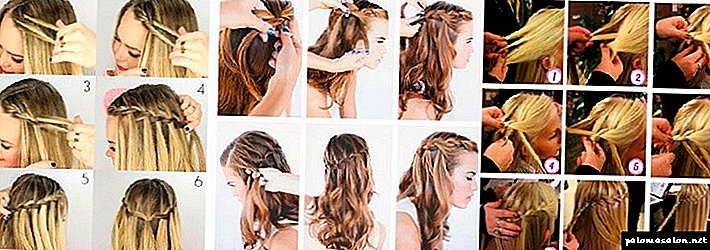
Romantic waterfall of hair: 3 image

You can add more romance to the “waterfall” pigtail by decorating with fresh flowers or beautiful hairpins.
If you most often prefer loose curls, or you think that the hairstyles you have gathered upward do not go well, then weaving can be combined with hair dressing. The step-by-step instructions below will tell you how to weave a braid - a French waterfall:
- We begin weaving with one of the temples, selecting a curl and dividing it into 3 parts.
- In turn, we impose 2 side straps on the central strand; we make pick-ups from above and below.
- After 1-2 such interlacings, the strand, which turned out to be underneath, is left hanging down in this position and in its place we select a new strand.
- In the same way, we lead the pigtail around the whole head, leaving the bottom strands and bottom and replacing them with new ones.
- The end of the braid can be fixed with a beautiful hairpin or with the usual “crab”.
Tip! Even more feminine on the hair will look with a ribbon, which is just enough to stretch through the finished weaving.

French weaving looks organically in urban settings, balancing and softening bold images
I hope the information described will be useful, and the question of how to weave the French braid in a hurry or in the evening version, will no longer take them by surprise. If you need more visual information, the video in this article will help you with this.
In the comments to the article there is an opportunity to leave your question or comment on the topic, I will definitely answer them!
What are the classic French braids and photos of their varieties
Plain braid - this is the most simple, fast and feminine styling. The French braid or, as is customary in our country, to call it “spikelet” implies classical weaving with the addition of side hair strands. Over time, this type of weaving also became annoying for girls who keep up with the times, and new varieties began to appear, for example, an inverted braid, in which the interlacing of side strands occurs from below the main braid, and not from above, as in the classics. There is also another species called fishtail. Its appearance slightly resembles a fish skeleton. And he trudges very simple, but for a long time. All hairs are divided into 2 main parts, of which, from the bottom, thin curls are taken and transferred to the next strand until the braid reaches the ends of the hair.
Step-by-step instructions for creating common French braids
Before you experiment with a variety of French styling, you should learn how to weave the classic version of the spit of a spikelet. For this you need:
1. Comb your hair and lay it back.
2. By a horizontal parting, separate the small upper part of the hair and divide it into three equal parts.
3. The first two weaving should be created, as in the usual Russian spit.
4. Then you need to grab a part of the hair along with the left strand from the side area and continue to weave the braid.
5. The same should be done on the right side.
6. So you need to continue weaving with catching the lateral hair until the braid reaches the back of the head.
7Then you can braid the usual braid from the remaining hair to the tips or tie a regular tail on the back of the head, decorating it with a beautiful hairpin.
After the realization of the technique of weaving a classic French braid, and you will spend a few workouts, you can safely proceed to the creation of many other hairstyles based on this braid. A good option for everyday and at the same time solemn hair is a bun with French weaving. To make it, you need:
• split the hair in a horizontal parting,
• from the back of the head upwards weave a French braid to about the top of your head,
• tie the tail of loose hair and the remaining ends of the braid on the crown,
• if you wish, you can take a finished bagel hairdresser and use it to create a more magnificent beam,
• it is put on the tail, then the curls are evenly distributed over it and fixed by invisible or hairpin.
No less popular is such a variation as the reverse French jacket, which can be braided on the hair, the collected tail, and also on loose hair.
The principle of weaving such a braid is as follows:
• hair is also prepared for weaving, as in the usual jacket,
• however, each extreme strand is enclosed under the bottom of the central,
• hair from the outside on each side is also reported to the central strand, which will be shifted over the top in the appropriate direction.
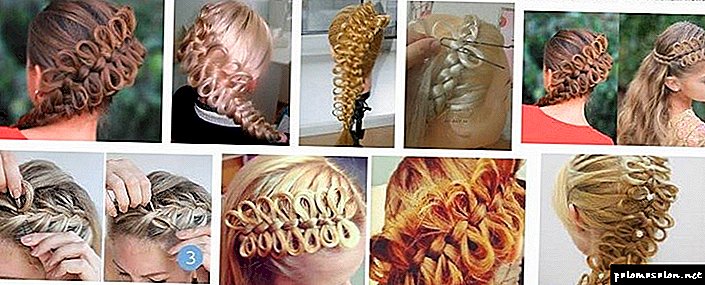
Spirals in French hairstyles: how to create a stylish image
Small spirals perfectly emphasize the spirit of France and are ideal for owners of long hair. The hairstyle of the spiral will instantly make the image majestic and attract a lot of interested views. In order to make French curls, it is necessary to separate small strands of hair and shape them into tight flagella or spirals and style them, fastening them with invisible hair, into a voluminous textured hairstyle. It is not necessary to use stealth for fixing, you can decorate your hair with hairpins. There are many variations of hairstyles with spirals, you can experiment with their thickness, style of laying, quantity and so on.
Shell - as one of the most common options for French hairstyles
The French shell, which has long become a classic, is the best option for celebrations, such as weddings, evening exits or important events. And most importantly, for such a hairstyle you only need varnish, comb, hairpins and desire. The advantages of hair is that it is quickly created and does not require the possessor of special skills from the creator.
1. To make it, you need to carefully comb your hair, then make a small stuffed on the top of the head and shift the entire head of hair to one side, securing the design with pins.
2. Then, using a wide comb, you need to collect all the hair and form a roller like it, twisting it vertically to the center of the head and securing it with pins. Forged earlier invisible he should cover himself.
3. Those hairs that came out from above, you just need to gently hide the hair inside.
4. It remains only to fix the hairstyle with lacquer and, if desired, decorate, for example, with flowers, beautiful hairpins.
This hairstyle is ready, now you need to supplement it with a little black dress, your favorite perfume, in order to finally reincarnate into a refined French woman.
Horizontal version of the spit of a spit: hairstyle French waterfall photo
Guided by the same technique of weaving a French-braid, you can create a bright and unique hairstyle French waterfall. Such a creation will help to open the face and at the same time remove the interfering strands, as well as leave the hair loose. This styling can be suitable not only for any life situation, but also for any hair length. The waterfall looks equally good both on long hair and on medium length, while the hair can be even, wavy, even curled into curls. But in any case, the creation of a French waterfall must begin with the weaving of the braid itself.
This will help to make the following steps:
1. To begin with, on carefully combed hair, you need to make a horizontal parting at ear level.
2. In this braid, strands from the outside will not only be added, but also released, creating the feeling of a waterfall.
3. Start weaving from the forehead at one end of the head, and end it at the opposite ear.
4. Weave braid need with a horizontal incline, attracting thin extra strands from above and below. Those strands that will be directed downward at the moment of interlacing must be released, and later new ones should be selected in their place. The thickness of the scythe from this should not change.
5. To keep the braid at the end of the weaving, you need to fix it with either a bright hairpin or a stealthy hidden stealth.
6. Now, free hair can be screwed onto the curling iron, straightened with an iron, or deal with it at your discretion.
A variety of French styling is not only very beautifully overcrowded, such hairstyles do not go out of fashion, always remain practical, and most importantly - it is very simple to create them. It is enough to master the technique of a french spikelet in order to discover the horizons for creativity in the spirit of Paris.
French braid for short hair
Owners of short hair fit "spike", braided not too tight. Ideal in this case looks a kind of traditional French braid - or "cascade". It is woven diagonally or across the head, usually from right to left.
On the right side of the head, a large strand is separated, divided into three small strands, and they begin to weave a “spike”, as described above.
The difference is that the hair is taken not from the left and the right, but from below (from the back of the head) and from above (from the parietal part), and the lower strand is lowered each time, not participating in further weaving. Hanging loose, these strands form the "waterfall" effect. In addition, they can be collected in a bundle on the side and decorated with a barrette.
Beautifully looks on hair of small length and traditional "spikelet", braided on a diagonal.
French braids for medium hair
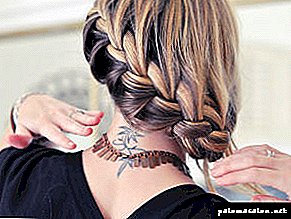
The owners of hair of medium length will decorate the French braid, braided from the bottom up. This hairstyle is done according to the traditional pattern, only with the head tilted down and weaving starts from the back of the head. Having reached the top of the head, from the free hair weave an ordinary braid and tucked it inside. In addition, from the remaining hair, you can twist an elegant bun and decorate it with a hairpin.
Women with rare hair to hide the "mouse tail" will help tucked French braid. She weaves in the usual way from top to bottom, and loose hair tucked inward at the back of the head and stabbed with a hairpin.
Hair of medium length will beautify the hairstyle and with a volume reverse French braid.
French braids for long hair
On long curls, the aforementioned reverse French braid looks best. It is also called Dutch, and the peculiarity of such weaving is that the side strands do not overlap over the central one, but are wound under it. The result is not a “spike” hidden inside, but, as it were, a braid superimposed over the head. To give it a volume, the strands should be slightly pulled out.
How to make a French braid?
The technique of weaving traditional "spikelet" is the same, regardless of the style of hair. At the preparation stage, the hair must be carefully combed. Naughty curls should be slightly sprinkled with varnish or smeared with gel.

In the same way, you can make two French braids - this hairstyle looks particularly elegant on girls.
France is a country that is rightfully considered to be the ancestor of fashion. It was here that there was such a simple and, at the same time, a unique hairstyle, like the French braid, on the contrary. The undoubted advantage of this braid is the fact that it looks great on both young girls and adult ladies, giving the whole look lightness, femininity and extraordinary elegance. The inside out is very similar to the classic French braid, but instead “In her hair, she seemed to rise above her.”
Now let's take a closer look at how to weave a French braid the other way around.
So, we need the following available tools:
- two elastic bands with a smooth surface
- comb (better massage brush),
- jewelry (you can use all sorts of ribbons, bows, hairpins, etc.).
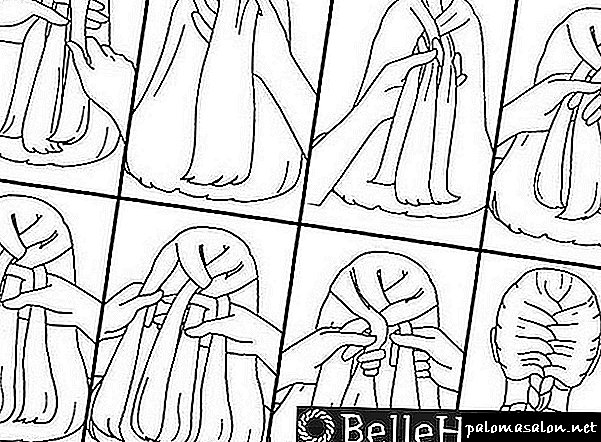
Weaving the French braid on the contrary: step by step instructions
1. Carefully and carefully comb hair. It is important that they be as smooth as possible. Decide exactly which part of your head you will start to weave, and how exactly your pigtail will be located - in the middle or side.
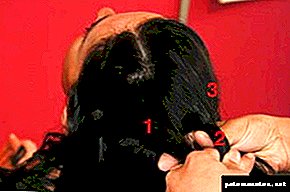
2. Take one strand of hair from the forehead, sides and from the crown, and divide it into three equal parts, as shown in the picture:

3. Take two strands in your left hand, as shown in the figure, and the third in the right. Put the right strand under the middle, grabbing it with your left hand. It is important that in the process of weaving you tightly interlaced strands with each other:

4. Now, with your left hand, stretch the first strand under the middle one. Do not forget that weaving should be as tight as possible:
Thus, you weave an ordinary braid, but skip the curls not over the weaving, but under it. As a result, the strands interlaced with each other “look” down.
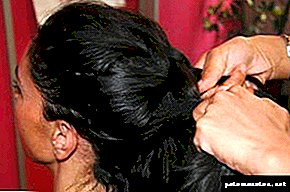
5. Continue to weave the braid, gradually adding hair to each strand from the right, then from the left half of the head. It is necessary to add hair before placing a strand under the weave:

Little advice : in order for the entire hairstyle to have a neat appearance, make the first two weaves without adding hair to the strands.
6. As you weave, you can add extra volume to the French spit. To do this, holding the braid in your left hand, with your fingers of your right hand, slightly pull the braided curls. It should be done very carefully, otherwise you risk to dissolve the entire hairstyle:

7. After the end of weaving, tie the resulting braid with an elastic band.
Tip: If your hair is very naughty, it is recommended to fix the hairstyle with hairspray with strong fixation.
You can not weave a braid to the very end, and fix it with a rubber band or a tape on the back of your head, leaving a loose tail. However, it will look beautiful only if your hair is of sufficient length.
Who will fit the French braid
This hairstyle is suitable for any form of face, it is not necessary for her to have bangs. Best of all, the French braid, on the contrary, looks with a strict business suit or light and romantic dress. Long earrings and graceful thin beads are perfect as an accessory, as this hairstyle completely opens your neck.
Thus, if you can boast with long hair and love hairstyles with braids, then the French braid, on the contrary, is an excellent solution for creating a new image. This simple and, at the same time, unusual weaving will appeal to absolutely all the representatives of the beautiful half of humanity. Having completed this unusual weaving, you will not only add new notes to your traditional image, but will emphasize the individuality of your style.
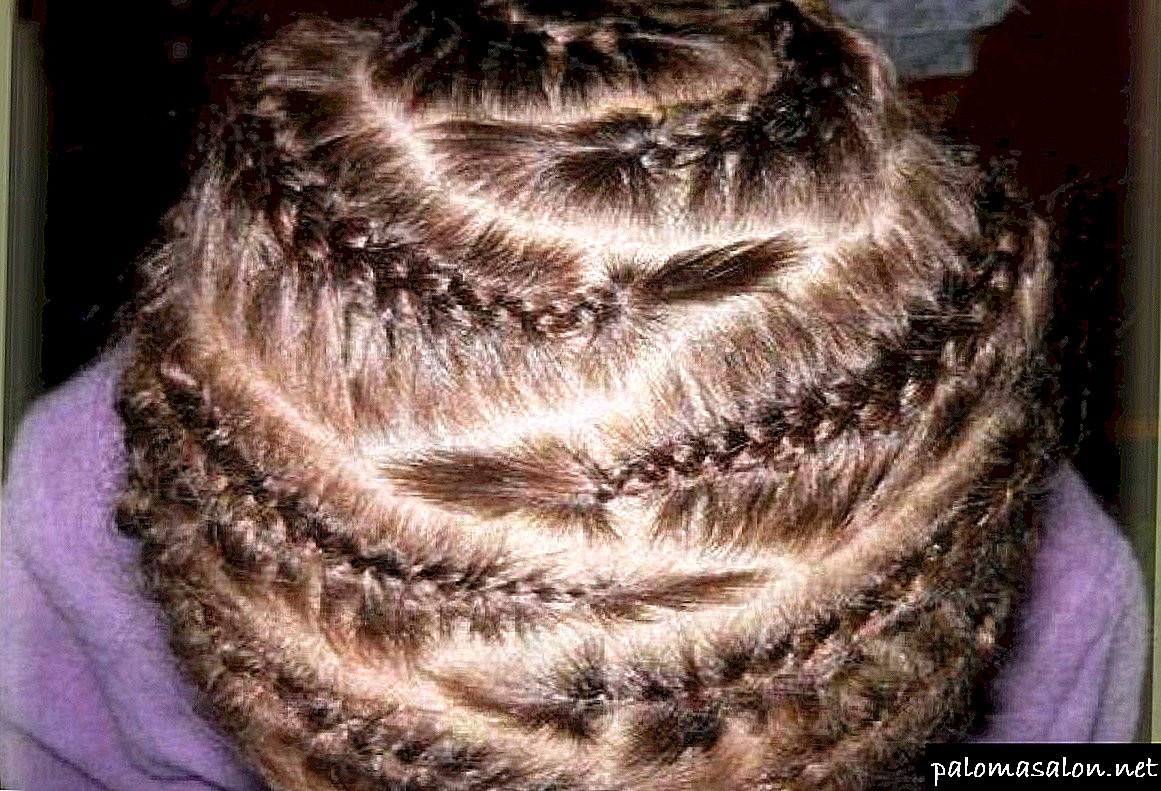
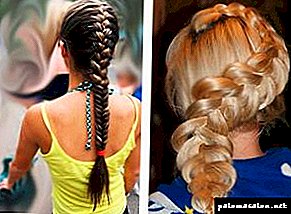
French braids are preferred by young people, active and self-confident. This choice does not depend on gender. They are equally liked by women and men. These braids have another name - "weaving on the skin." Weave them close to the skin, forming a kind of geometric pattern.
The client, depending on his imagination and desire, can himself choose what form they will be. Today, professional masters are able to realize all the vagaries of visitors to beauty salons.
French pigtails resemble African ones, even more likely they are a variety of them, only the latter are small in size and are worn longer.
French braids are in fashion!
The pioneers of French weaving became street youth. This hairstyle came to her taste due to its functionality. Hair does not interfere at all to devote time to various sports.
Very quickly, the French weaving passed on to the pages of popular magazines, podiums and began to crown the heads of famous people. Thanks to such pigtails, their owner instantly stands out from thousands of people.
This is a hairstyle option for people who are able to look at the world with a new look. A man with french-jackets is not afraid of attention from the outside, it can be different and does not lose personal individuality.
Pigtails woven in this way became a salvation for girls with long hair. It is believed that the length depends on how large the place for the experiments. For a woman who wants to feel young and modern, French weaving is the most optimal solution. Another plus is that it can be combined with anything, for example, with afrokosichkami, curls, and even with straight hair.
The average duration of wearing french braids is two months. At this time, you can easily wash your head with the usual means, but only once a week, not more.
How to braid the French braids
Artificial strands can also be used for French braids in addition to their hair. Even a short hair length of 10-15 cm is not a hindrance to such a hairstyle. Just in this case, a beautiful pattern will end in the neck.
For medium or long hair, pigtails with French braiding are also a suitable solution. It will be possible to forget about styling every day and all sorts of styling products.
Colored strands can be woven into the hair. This will add more originality to the hairstyle. But be prepared for the fact that when choosing this stylish hairstyle you have to spend a lot of time in the hairdresser. Weaving French braids for longer than making African ones. The difficulty is the pattern.
Masters do not recommend walking with pigtails for more than 6 weeks. Hair over this period significantly grow and spoil the look of hair. When pigtails are unraveling, you should not immediately resort to new weaving. Hair should be given time to rest at least one month.
Hair length and French braids
Artificial material is used to create french chests by braiding Afro-braids.

It is possible to weave service jackets without the addition of artificial hair. The main thing is that native hair should not be shorter than 10 cm. The hairstyle is not designed so that pigtails flutter. The length is required for the braids to gently stretch along the head. In the future, they will not interfere at all.
If you have short hair, are tired of daily styling and want a little rest from the procedures with the use of styling products, then this particular hairstyle will come to your aid and create an unusual image. Your head will be transformed by an unusual net of braids or a clear zigzag, and all this charm in the neck area will end.
When the hair length is medium or very large - this is a big plus. From you will depend only on the choice of the picture, which will decorate the head. You will also decide whether you need strands of a different color from artificial material, elements of jewelry, additions to afrostil.
All weaving will take more time from the master than he spends on afrokosichki. Weaving goes on the scalp. If you want some unusual pattern, you will have to free up the whole day and spend it on a trip to the salon.
The basic rules of weaving a french-braid for children

- It is necessary to make the weave tight, while not strongly clamp. It is very important that the hairstyle for girls is comfortable everywhere - in the kindergarten, at school, and on a walk. After all, with such braids she must spend the whole day.
- A neatly made hairstyle with beautiful pigtails gives the girl confidence, because she herself will like herself.
- Before studying, do not make difficult versions of braids. This will tire the girl, so it is advisable to meet in 15 minutes. It will save your nerves and peace of the child.
Holiday hairstyles for little princesses
In addition to strength, the French braids have another advantage. They always look beautiful and festive. Therefore, you have the opportunity before the solemn event to include all the richness of your imagination.


For example, in the kindergarten to the graduation you need to quickly perform an elegant and durable hairstyle. It is necessary to prepare thin satin ribbons in pleasant tones. Also need a gypsy needle. And also all that can be useful for decorating hair.
- The first thing to do is to braid the French braids on the head somewhere to the middle.
- The hair behind leave loose. In the future, they are subject to perm.
- After it is necessary to cut the ribbon into pieces about 50 cm.
- Insert one piece into the needle and walk along the side pigtail, starting from the back of the head and following to the face. A small piece should remain on the bow. Firmware conduct neatly. The stitch length should be the same.
- Try not to pierce the pigtail itself, but to hook the needle under it.
- After the pigtail is ready, it will resemble a bandaged one.
- Then repeat the same thing, only in the opposite direction, making the move crosswise.
- At the end, tie both ends of the ribbon into a bow.
- So do with every pigtail.
When the hairstyle is ready, you will appreciate the originality of this idea.

There are many more unusual and beautiful hairstyles. Original and elegant looks the next option.
How to braid two french braids:
- First you need to comb your hair very well.
- Parting them to divide them into four parts.
- Each resulting sector twist into a bundle and hold the fixation of rubber bands.
- Weave the first pigtail right to left, diagonally down.
- From above take part of the hair, divided into three equal strands.
- The right strand goes to the middle, the left covers the top.
- Then take a small strand on the right, connect it with another right side. The resulting strand falls on the middle, after the middle is relegated to the right.
- Mirror all on the left side.
- When the second braid will stumble, then where both braids intersect, it is necessary to switch to weaving the usual braid.
- After this section to continue weaving with pickup. Weave in French continue until the loose hair runs out. And then weave ordinary braids.
- Below to hold the fixation of the gum.
- To give the pigtails volume, it is necessary to pull the strands neatly from the braids. As a result, the braids seem to stretch to the sides. You can add all kinds of jewelry, hairpins.
French braids - hair care
Duration of wearing French weaving is much less than African. Pigtails are worn for about two months. Hair, growing back, begin to spoil the entire hairstyle, drawing is lost.


Care for jackets is to respect them. It is necessary to wash them carefully with the usual means, in the usual way - with your hands or using a sponge. At the end of the wash it is necessary to blot them with a towel. Do not try to rub them! So you can injure your hair and ruin the whole hairstyle. Special balms do not need to use. They will not give benefits, as they will not be able to thoroughly saturate the braids. Even, on the contrary, can give them an untidy look.
And finally
French braiding makes hair practicality, making it comfortable. Every woman will look younger with him. Such braids are universal and suitable for any age and gender.
Today, this hairstyle has already fallen in love with men. On the streets you can meet a lot of guys with French pigtails. This is explained by the fact that long-haired men prefer to make their own modern youth hairstyles, and not to collect strands in the usual tail or braid.
In this article, we suggest that you familiarize yourself with various hairstyles, which are based on the French braid. At first glance it may seem that even a classic braid is quite difficult to perform, and a hairstyle from a braid is even more so. However, this is a profound error! Choose a few options that seemed to you the most cute, and then feel free to start experimenting! A little practice - and it will turn out to create an unimaginable beauty on your hair!
The universality of hairstyles from the French braids
Consider the type of your hair. For example, owners of thin and not too thick hair can opt for large braids. Before weaving the hair you need to slightly comb it, but in the end, use the method of pulling apart the strands - this will create a larger volume. For girls with thick hair, we recommend thinner braids - you will get the effect of some lightness and lightness of hair that looks fresh and feminine. Moreover, if you do not have long hair, then you should not give up braids. Medium length curls can be easily braided into a beautiful French braid. If you are the owner of short hair, then do not rush to get upset. Spit weaving allows the use of additional artificial or natural patch strands. Independently to do this is not very easy, so you should contact a professional.
So, we will proceed to the description of the technique of weaving classical French braids.
- Comb all your hair back. Separate at the crown one wide strand, which is then divided into three equal parts. The wider the strands, the larger the spit will be.
- The right strand is thrown over the center - now the right strand is between the left and the center. The same must be done with the left strand. We throw it over the strand with which we have just worked. In other words, we started weaving an ordinary braid.
- Now we continue on the same principle, but weaving in additional strands that we take from the temple.


Classic three-row
Making yourself a classic French braid is a snap. The technology of its creation is similar traditional weaving , with the only difference that the work begins with a small strand with the subsequent addition of loose curls.
To begin with, comb your long hair well and moisten it lightly so that it is less confused. If your strands are too naughty, then you can put on them a small amount of styling agent. This will greatly facilitate the process of creating hairstyles from long hair and help them to maintain a neat look and a constant shape for much longer.
Separate a small strand from the frontal part of the head of hair and tie it into a ponytail on the crown with a thin rubber band in hair color.
To the right and left of the central strand, separate from the temporal part of the head of hair the curl, approximately corresponding in thickness to the tail tied at the crown.

These three strands will be the beginning of our French braid. Begin to weave the braid in the traditional way by placing the right strand on the central one, and then, throwing the left strand over it.
In the next step, take a small part of the free hair on the right and transfer it along with the strand on the right side to the center. Do the same on the left side.
Continue to weave a braid of long hair in such a technique (picking up additional strands of loose hair in each new link) until the entire head of hair is assembled into three main strands. Next, braid the traditional three-spit braid to the end of the hair.

With a little practice, you can create chic styling based on this technique, changing the location of the braid, braiding your hair in several rows or creating zigzags. At the same time, the free end of the braid can also be laid in an interesting bun, bun, or curl.

In order to better learn the lesson, watch the video.
Weaving the opposite
Make even longer hair out textured French braid than in the previous case, you can use the technique of weaving vice versa.
The sequence of actions of this weaving is similar to the previous method. Also, first separate a small strand of hair, divide it into three equal parts, and in the process of weaving, add small additional curls from the free part of the hair on the right and left to the main strands.
Here are just the main difference between the braids on the contrary in that it is woven, as if around it. That is, strands fall into the middle not through the top, but skipped to the bottom of the work.
Based on this technique you can also make very interesting styling. Extra chic french spit attached slightly elongated from the links weaving strands, creating a chic volume and a unique openwork pattern.

Weaving a French braid from long curls over it is shown in the video.
Four-strand French chic
If you have mastered the weaving of the French braid in the first two ways, you can try to make more complicated hairstyle from long hair, in the creation of which four main strands are involved.

It will be very easy to carry out this work by those who own the technique of creating the usual four-spit braid. You can make it as follows.
Divide the original strand into four equal parts. Cross over between the middle strands, and then the strand that was on top, hold under the extreme part, and the one that came out from below, wind up the next extreme one.
Again cross over each other strands that are in the middle, and re-braid them on the same principle with the extreme parts of the hair.

The peculiarity of the weaving of the French braid is that on each new coil, small curls from the free part of the head of hair are added to the extreme strands on the right and left. As in the previous cases, work with the addition of strands is carried out until all the hair is collected in the braid. Further the usual four-spit braid braids.
Based on this scheme, experienced stylists make very beautiful holiday styling. Also, such weaving is often used to create wedding hairstyles.

The video will help you learn how to weave a braid of four strands.
These are only three main versions of the French braid. In addition to the above, you can also make a fishtail braid, openwork or with bows of hair. It would seem that the pattern of their weaving is very complicated, but in fact each will be able to create these hairstyles. The main thing is to master the sequence of actions well, have patience and add a drop of fantasy. And as a result, you can get hairstyles no worse than the girls in the photo.

Masking serves to protect areas of paper from paint, and also allows you to save already applied light paint. In traditional watercolor, the artist moves from light tones to darker ones.
Use of masking fluid in watercolor
French braid: the story and the essence
Many believe that the French braid was invented by some French hairdresser, and therefore received such a name. However, images of such a hairstyle were found in the form of rock paintings in Algeria, it is known for certain that the heads of ancient Greek sculptures decorated such braids. Why, then, are they called French? The fact is that one skilled hairdresser from France created similar masterpieces on the hair of court ladies. Since this country is a recognized fashion trendsetter, why not a haircut to assign this origin?
In general, the classic French braid is a weaving of three identical strands. Usually it is pressed tightly against the back of the head and deviates slightly to the side. This hairstyle is versatile, it is equally well suited for perfectly smooth curls and curly. It is impossible to braid except that the shortest hair, the length of which does not reach the level of the chin. Pigtail in the French style will suit both young fashionable women and quite mature women.
Learning to braid

To date, there are several types of French braids, but they are all based on the classical version. It is from him and should learn the technique of weaving. So, how to weave a French braid correctly? Consider a step-by-step instruction.
The principle of weaving a classic braid
- Well combing the hair, remove it back and select the wide strand of hair closer to the top of the head, for convenience, fix it with a silicone rubber band.
- On the sides we separate two more of the same strands.
- As a result, we should have 3 identical parts.
- Strand on the right is laid on top of the center one, and then the left one is crossed with medium curls.
- We continue to braid the braid, each time grabbing a little curls along with a strand closer to the temple.
- Acting on the same principle, we continue to weave the braid further, until the end of the hair.
- Fix the braid with a rubber band or barrette.
If desired, you can release a few curls near the face, as well as slightly fluff the weave with your fingers, so that it acquires additional volume and delicacy.
The whole process only at first glance may seem complicated, in fact, when you have already mastered the weaving of the French braid, it will take 5–7 minutes.
Some recommendations

- It is not recommended to braid the braid on the clean curls that you just washed, it is better to wait a couple of days, then the hair will be more docile.
- If you decide to braid your braid yourself, put two mirrors opposite each other, so it will be easier for you to observe the process and control your actions.
- Pre-hair can be slightly moistened with water from a spray.
- Thin curls are recommended to be slightly combed in the root zone, so the pigtail will look more effective.
- In order for the braid to be smooth and neat, the locks grabbed on both sides must be the same.
- It is necessary during the weaving of the French braid to constantly adjust the degree of tension of the strands, it must be the same throughout the process.
- To make the spit even, you need to carefully comb through each strand before you add it to the weave.
- If the hair is too soft, and the pigtail tries to break up, you can at the end treat it with varnish.
- Beginners can practice on the head of hair of a friend or daughter, and then repeat the weaving on their own hair.
Other French Spit Options

When you understand the technique of weaving traditional French braids, you can move on to more complex options. With their help, it will be possible to beautifully collect hair or to issue a grown-up bang, and also they will allow you to get a stylish, spectacular hairstyle for any event.
Weave ribbon
The most common ribbon can be an original decoration for the French braid and give the hairstyle an original look. The accessory must be selected in color to match the strands or along, in any case, it should be in harmony with the overall image.
- We divide the upper zone of the head of hair into 3 identical parts.
- Under the central strand, using stealth, fasten a suitable ribbon.
- Take the extreme strand on the left and hold it over the central part of the hair and under the tape.
- Then we take the strand on the right and do the same with it, but now the tape should pass under the strand below.
- Repeat 2 previous paragraphs.
- We continue to weave a braid according to this instruction, but each time we grab loose hair from the side and add it to the strands.
- The tip of the braid is elastic with a hair color.
Note that it is easiest to weave thin ribbons into your hair.
French side braid

The French braid, braided not at the back of the head, but at the side, looks incredibly feminine and romantic. With this hairstyle, you can safely go on a date, to the theater or evening walk. Suitable weaving for hair of medium length and long curls.
- Having well combed the hair, separate the curls from one side of the head.
- This hair is divided into 3 equal strands.
- From the crown we begin to braid the braid, acting in a familiar pattern, and each time we add to the strands a little curls on each side.
- When the braid reaches the level of the neck, add to it the remaining free part of the hair on the other side of the head and collect everything in a tail or pigtail.
- We fix all with a rubber band or hairpin.
Tip: you can wrap the base of the tail with a strand of hair and fix everything invisible, so the hairstyle will look more aesthetic.
French braid in the tail
Unusual and at the same time simple hairstyle will be an excellent option for every day, it will remove the curls from the face and elegantly arrange them in the form of a braid and tail.
- We select on the back of the head in the middle a wide strand.
- Dividing it into 3 parts, we weave the French braid in a way we already know.
- Bringing the braid to the hairline, stop weaving and gather curls together.
- Select a thin strand from the tail on the right and wrap it around it, fix it with invisible ones.
- We take one more strand on the left and also wrap it around the tail, fasten the curls with invisible ones, hiding the tips inside.
- Additionally, we fix the braid with the help of Invisibles, securing them where required, sprinkling everything with varnish.
Showing a little imagination, you can create your own compositions in your hair with the participation of the French braid: you can braid it diagonally, in a zigzag, in the form of a wreath around your head, connect with a regular braid, make several braids or a braid on the contrary - there are a lot of options!
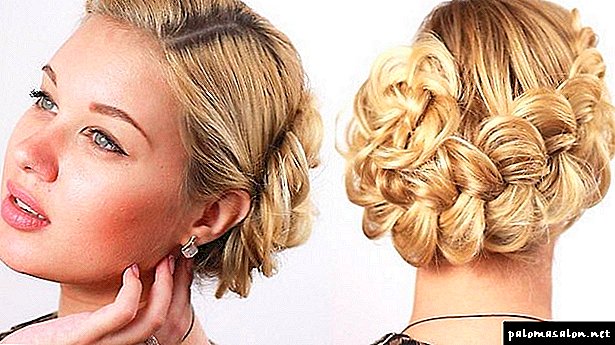
Evening and festive hairstyles

The fashion trend today was the creation of evening images with a French braid. With such a haircut, it is not a shame to go to any celebration from a corporate party to a graduation party. Even world celebrities come to the "red carpet" with braided curls, and often the bride as a wedding hairstyle choose just such an option for the design of strands.
Thanks to the "Shell" with the French braid, you can create an incredibly feminine and sophisticated image. Consider the main stages of its creation:
- Well combed curls and straight vertical parting divide them in half.
- One half of a head of hair is combed at the roots.
- We fold these curls in the form of a shell, hide the tips inside and we pin all the studs.
- From the second half of the shag weave the classic French braid, its tip is fixed with an elastic band.
- We put the pigtail in the form of a ring near the "shell" and hide the ends of the hair inside.
- We pin curls with hairpins where it is needed.
- We decorate with hairpins or hairpins.
History of the French Spit
 Despite the name of the hairstyle, its origin does not have much to do with France. The first information about such weaving appeared in the south-eastern part Algeria: The age of cave paintings depicting women with similar hairstyles is six thousand years.
Somewhat later, a similarity to the French braid appeared on male and female statues in Ancient greece. The mention of her was found in the ancient Celts and in the representatives of the Chinese dynasties, where the braid was an element of more complex hairstyles.
And yet, why such a braid is called exactly French? For the first time this name is found in the American edition of the Home Journal, but this is not an announcement. It is believed that a French stylist invented a braid as an alternative to the standard British Spit.
But surely this is due to the fact that France has always been considered center of world fashion, and it was believed that all trends come precisely from here. Thus, although the hairstyle is called French, in fact it can be considered one of the oldest inventions of the hairdressing industry.
How to weave a French braid?
 Now there is many methods weaving french spit. They all look interesting and elegant, and, having learned techniques, you can flaunt a new hairstyle at least every day.
Exist shared secretsoffered by hairdressers. So, braids are best done on clean, dry hair.
If you have them naughty, it is better to leave them a little wetor use styling products. With the help of special mousses, waxes and gels you can make your hair softer and more pliable.
Common Spit
Classic scheme involves the use of all hair and bangs, if any. Weaving begins with the forehead and ends at the back of the head. Follow this algorithm:
- Comb your hair qualitatively, take a strand from the center of the head, and divide it into three equal parts.
- Then go to the side of the right side and throw it through the center strand. Do the same with the left strand.
- Then add to the left and right strands more in part of the remaining hair. Try to make them equal - as a result, the braid will be neat and level. Weak braids look more romantic. If you like this option, take wider strands, and for tight braids, narrow ones. Continue braiding until all hair has been braided.
- After weaving, secure the pigtail with rubber.
How to weave the usual French braid look at the video:
Spit contrary
Reverse way weaving involves a braid from neck to forehead, and not vice versa, as in the classic version. This option is often called dragon. The technology is as follows:
- At first, we need to weave it by analogy with the previous view, but then, when the strands will intersect with each other, they should be brought under the main central strand. It is under, not on it.
- Hair is added to all weaves. This allows you to increase the volume.
- Further a simple braid is woven by a similar method. Put each part of the hair under the bottom.
Master class, how to weave a French braid on the contrary, look at the video:
Diagonally
It looks interesting option french braids diagonally, the weaving technique of which is as follows:
- Near the temple, take a strand of hair and divide it into two parts, after you cross them.
- Take the third strand of braids from the top layer of hair.
- Make the first binding, then take a small strand at the bottom of the head. The thinner the strands, the better the hairstyle will look.
- Alternate the hair with each weave, taking it from the bottom, then from the top.
- With such a spit, the line should smoothly descend, go obliquely.
- Having finished weaving, make several turns of a simple braid, and from the remaining curls make a bunch or a tail.
Braid
Very nice hairstyle option that lags around head:
- First you need to make a parting from one ear to the other. Fix the remaining hair with a rubber band or barrette. Need to weave from the left edge.
- Tie up only small strands. Weave braid on the type of rim, moving to the right ear. Weave until the strands run out, then make a rubber tail. You can also continue to weave a simple braid, after securing it with a barrette.
Spit waterfall
Luxurious hairstyle with falling curls. It is not easy, but the result will fully justify your efforts:
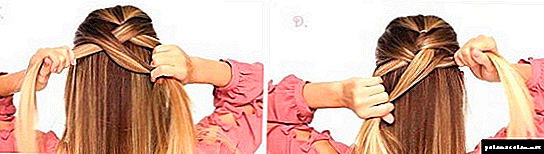
- Take three equal width strands near the forehead area.
- Apply the upper strand to the middle strand, and the lower one in the middle between them.
- Now leave the bottom strand alone. From the bottom take a new strand, repeat with it what was in the previous paragraph. As in the classic version, do the upper part with a grip. After the end of one tier braids strands from the bottom remain.
- Bring the weaving to the desired trait, then tie the hair.
Spit-zigzag
Interesting pigtailsuitable for both girls and adult ladies:
- Split the hair in a smooth parting from the side. At half the hair, where there are fewer, split the strand into three equal parts. After start to weave. To make the zigzag correct, weave only the upper part of the hair.
- After reaching the other side, lower yourself down and begin to weave the braid in the opposite direction. As a result, you will get the letter Z, noticeable already at the end of weaving.
 How effective is the use of Botox for lips tell our material.
Want to look spectacular - draw poppies on your nails by reading our article.
Openwork Spit
Openwork weaving French braid looks very nice and romantic. Often it is chosen by the bride to create wedding hairstyles:
- At the crown, select the bundle of hair.
- On the right side, the hair at a similar level cross with the central strand. On the left side, do the same.
- When you cross the center strand with the side straps, slightly loosen the fingers with which the strands are held, you pull out the strand woven to the right. Pull it up to the formation of a gap between the strands on the right and in the center about the size of your finger. Leave a lumen, pull the hair a little more, just at the edge of the right strand. One open loop is ready.
- Similarly, pull out the left strand. Then again add strands on both sides, as in classical weaving. Stop, and repeat the action, in turn pulling strands.
- Weave and pull openwork loops to the end. Spread them with your fingers so that they are identical and look neat.
- Finishing weaving, secure the hair with a rubber band.
Spit "air spike"
 Such a scythe looks perfect on even hair, therefore, if your curls curl, straighten them before you start weaving. The highlight of this type of braid is its lightness.
You need to select a small strand above one of the temples, and start weaving. Add locks only from the side where the hair is larger. Thin braid will descend from the temple where you took the strand.
A braid can be woven both from the center, and from the side, and from the tail. the main thing - keep the desired lightness.
Spit "fish tail"
Spit "fish tail" looks very cute and appropriate in any situation. To braid it, do the following:
- Hair should be collected in a ponytail, securing the maximum with an invisible rubber band.
- Divide the hair in the tail into two equal parts. Then take a small strand from the outside of the hair, placing it to the curls of another part. Similarly, go to the hair strand from the second part, and do this action until you reach the end of the hair.
- Move the strands so that they end up on the inside. If you want to get a symmetrical braid, keep an eye on the same strand size. If you like tight braids, try to maximize both sides of the hair in the opposite direction. As a result, they will lie tight.
- Finishing the braid, fix its tips with a small rubber band.
If you like more casual hairstyles, you can pre-curl a little hair, and try to weave a braid not tight.
Hairstyles with French braid
You can weave a few braids, later creating of them unusual beautiful designs, to combine different types of weaving in one hairstyle, to make a French braid only on a part of hair, and so on. Quite often, such variations are used as wedding hairstyles.
Such braids are combined with all sorts of decorative elements. It can be beautiful hairpins with stones, tiaras, studs, live and artificial flowers, wreaths. The options are many, and they are suitable for a variety of cases. The main thing - do not be afraid to experiment.
The difference of weaving for oneself and another person
 To weave a scythe on someone else, you just need to understand weaving principle, and you immediately get a good result. Plait braids on someone easier, since both your hands are free, and you can hold them as convenient.
The whole picture of weaving is in your sight, and you can quickly and easily remove or straighten all the defects. As simple as possible You can make the braid weaker or tighter, adjust the tension of the hair. Until you finish weaving, your hands will not have time to get tired.
WITH self-weaving more difficult. For the result to be similar, practice and confidence are needed. It is also better to use two mirrors facing each other. Lay a comb and other necessary accessories alongside to minimize unnecessary movement. To keep your hands from getting tired, you need to train them.
Learn better on unwashed hair, as they are simpler than perfectly clean, amenable to stacking. To learn to weave on yourself, you need time, but at some point, everything will start to turn out for you, and without any problems you will be able to regularly please yourself and others with new stylish styles.
How to make a hair with a French braid look at the video below:
Technique weaving classic French braids
So, we will proceed to the description of the technique of weaving classical French braids.
- Comb all your hair back. Separate at the crown one wide strand, which is then divided into three equal parts. The wider the strands, the larger the spit will be.
- The right strand is thrown over the center - now the right strand is between the left and the center. The same must be done with the left strand. We throw it over the strand with which we have just worked. In other words, we started weaving an ordinary braid.
- Now we continue on the same principle, but weaving in additional strands that we take from the temple.
We advise you to try to weave such a braid on a diagonal, starting weaving from the side and leading it down diagonally. You can leave the end of a pigtail free or tie it in a bun.
What to wear with a hairstyle
Most effectively, this option of weaving a braid will look if you wear a light dress made of flowing fabric. Also openwork blouses and loose skirts will do. In this case, should make the hair more voluminous. To do this, first wind the hair on the curlers, and then start weaving.
If you want to create a luxurious look that is ideal for a festive event, then by all means rely on accessories that will complement your hairstyle. These can be contrast ribbons or vintage hairpins. The hair in this embodiment is best left smooth and even, and not to twist on the curlers. It all depends on your desires and fantasy.
Weaving French braids (classic version)
The essence of weaving any of the variants of the "French braid" is the addition of additional strands to the main strands of the braid from the free mass of hair.
The classic version is created as follows:
- Hair should be carefully combed. Owners of liquid hair are recommended to make a bouffant on the front of the head.
- It is necessary to separate a small strand of hair over the forehead and tie it with an inconspicuous silicone rubber band.
- On each side of the central strand must be separated one more, and the same size.
- Make a binding, throwing the side strands on the center, as for a simple braid.
- On the next cover, you must add hair from the free mass of hair to each side strand. It is necessary to grab the strands on the sides and parallel to the height of the braid.
- Similarly, weave a braid until the loose hair runs out (approximately to the base of the neck).
- Next you need to do the braid to the end and secure with a rubber band.
- Silicone gum on the top strand must be camouflaged under the hair or carefully cut off with thin nail scissors.
- You can leave a tight weave, and you can add pomp. To do this, slightly lower the lower gum and stretch the parts of the braid along the entire length.
- In order for a hairstyle to look neat for a long time, you can spray it with varnish.
French braid with woven ribbon
To make any braid bright, original and festive it is enough to add decorations, for example, a shiny color ribbon.

Some tips on choosing a ribbon:
- The tape should be soft (no metal frame inside).
- The optimal width is 1.5 centimeters.
- Before use, it is advisable to wash the tape so that the color does not shed and does not dye the hair.
How to weave (two of the simplest of the many possible options):
- The “French braid” with a ribbon is woven in the same way as the classic or three-dimensional version, but instead of the central strand is used a ribbon. It needs to be fixed invisible, chosen to match the hair under one of the upper strands.
- After dividing the hair into strands, from which a “French braid” will be formed in the future, it is necessary to tie a ribbon to the middle strand. Both ends of the tape must be equal and must be much longer than the hair (otherwise the tape may not be enough). Ribbon halves are added to the side strands. After this, the "French braid" is braided, you just need to try to shift and add strands so that the ribbon always remains on top. It is best to shift the hair first, and then put tape on top of it.
French fishtail
Among other variations of the "French braid" for its originality, the special love of the weaker sex deserved a "fish tail", also known as a "spike". It can be straight, and oblique, and tight, and lush, with a combination of other elements, for example, ordinary braids, beams, tows or tails.

How to weave a French fishtail braid:
- Clean and thoroughly combed hair should be divided into two equal parts with parting in the middle.
- The French version of the "Fish Tail" starts from the forehead, while the usual one - at the base of the neck.
- In order to form weaving it is necessary to separate small (conditionally equal) strands from the edge of each part of the hair and alternately throw them on the other side.
- Thus, the "fish tail" braids along the entire length of the hair, and at the end is fixed with an elastic band or a hairpin.
- To give the hairstyle French charm, you can decorate it with flowers.

Bulk French Spit with a beam
“Inverted French braid” is often used together with various tufts. The beam can be formed from the braid itself or assembled separately, and can also be located above and below the scythe.

- First of all, the “French braid on the contrary” is woven (one or two at will). It can begin in any part of the head (at the forehead, at the neck, behind the ear, and so on).
- The braid is woven to the right place and fixed (with a silicone rubber band or invisible in hair color).
- Then a bundle is formed (the braids are twisted, plaits or a donut is used).

French braid to the side
It looks very interesting "French braid", not directly braided, but on its side or in a zigzag. That is, weaving should begin not at the forehead, but behind any ear. Then weave not downwards, but diagonally. If a zigzag is planned, then reaching the edge it is necessary to turn the weaving in the opposite direction. The rest of the technique of execution is no different from the classic version, or "the opposite way".

How to braid yourself two French braids
Such a wonderful weaving, as the "French braid" will look great in duplicate. This option for its originality, beauty and practicality will especially appeal to young girls. After all, it can be done both for study, and for a walk, and for a party, and on a date.
How to braid two French braids:
- It will take two mirrors that need to be installed against each other so that if you look at one of them, then in the other you can see the back of the head.
- To divide the hair vertically into two equal parts.
- One piece temporarily put aside and stabbed so as not to interfere.
- From the second part to form a “volumetric French braid”, moving from top to bottom and tie it with an elastic band.
- Release the second part and do the same with it.
- Fluff and decorate braids.

French braid with bows
The elegant and sophisticated young ladies will love the “French braid with bows”. This hairstyle will look great with evening dress or wedding dress.
- It is necessary to separate a small amount of hair from the forehead and tie them so that they do not interfere.
- From the remaining hair is required to braid the classic "French braid" to the side.
- Secure the finished braid with a rubber band.
- Then left hair should be combed and moistened with water so as not to be fluffed.
- In the first ring of the finished braid it is necessary to thread the pin.
- Separate a thin strand from the mass of loose hair, moisten it, form two rings, one of which is threaded into a hairpin and stretched through a braid.
- Hide the remaining tip under the hair.
- Separate another thin strand and do the same actions, but only in the next division of the braid.
- So with all the hair left.
- To correct a hairdress and to spray a varnish.
French Spit - Waterfall
And lovers of flowing hair can be useful "French braid". For example, to create a romantic hairstyle, which hairdressers call the "French waterfall". In her hair are woven into a braid and directed down so that they really resemble jets of water.

- Weaving starts from the temple like a regular braid.
- Three strands are separated. The bottom one is put on the central one, then the top one is put on the central one.
- Again lower, then upper.
- A small strand is now separated from the loose hair and placed there, with the ends (top and extension strands) left hanging down.
- Next, the bottom strand spreads over the hanging, which takes its place.
- The top strand is shifted again.
- Now you need to separate a small strand under the scythe and throw it on the top (just like before the bottom one) and so on.
- In this way, all the hair around the head (from the temple to the temple) is woven.
- The ends of the "waterfall" can be left straight, but you can curl.
No wonder the people from time immemorial say "Spit - girlish beauty", because she can make any lady a little more beautiful, more graceful, more pretty, more romantic and feminine.